Mouse as a Paint-Brush
이 문서의 코드는
cv2.imshow가 가능한 local 서버에서 동작하는 jupyter note 등을 대상으로 구현됨.
Colab 이나 원격지 서버에서 동작중인 jupyter note등에서는 동작하지 않음.
Goal
OpenCV 에서 mouse event를 다루는 방법을 익힌다.
- mouse event를 처리할 callback함수를 만드는 법을 익힌다.
-
실제로는
cv2.setMouseCallback()함수를 통해 callback함수 등록하는 법을 익힌다. -
참고자료: Callback이란
Simple Demo
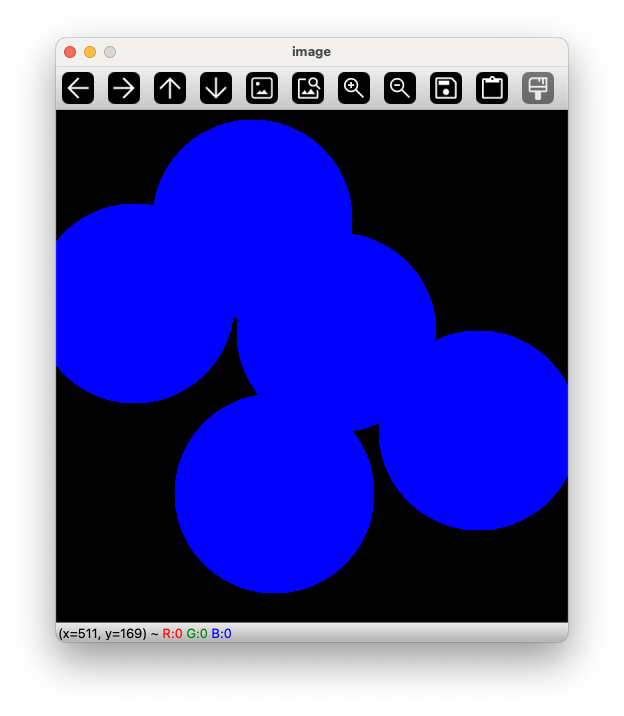
이를 위해 더블클릭을 한 지점에 원을 그리는 간단한 application을 만들어 본다.
- 우선, 마우스에서 발생하는 이벤트 Mouse event 가 발생시 호출되도록 지정된 mouse callback function 를 구현한다.
- Mouse event 는
left-button down,left-button up,left-button double-click등과 같이 모든 마우스 관련 이벤트를 가리킴. - Mouse event 가 발생시, 모든 경우 이벤트와 관련 마우스의 위치 좌표
(x,y)가 제공된다. - 이벤트 종류와 위치 정보를 가지고 원하는 처리를 수행하도록
cv2.setMouseCallback()를 구현하면 된다.
참고로, cv2에서 사용가능한 event가 무엇이 있는지는 다음의 코드를 통해 확인할 수 있다.
결과로 다양한 event들을 확인 가능하다.
'EVENT_FLAG_ALTKEY','EVENT_FLAG_CTRLKEY','EVENT_FLAG_LBUTTON','EVENT_FLAG_MBUTTON','EVENT_FLAG_RBUTTON','EVENT_FLAG_SHIFTKEY','EVENT_LBUTTONDBLCLK','EVENT_LBUTTONDOWN','EVENT_LBUTTONUP','EVENT_MBUTTONDBLCLK','EVENT_MBUTTONDOWN','EVENT_MBUTTONUP','EVENT_MOUSEHWHEEL','EVENT_MOUSEMOVE','EVENT_MOUSEWHEEL','EVENT_RBUTTONDBLCLK','EVENT_RBUTTONDOWN','EVENT_RBUTTONUP',
mouse callback function 은 parameters의 순서나 갯수 등의 정의된 형식 을 변경해선 안된다.
이 형식은 어디서나 동일하게 구현되어야만 하며, callback으로 등록되기 위해서는 각 parameter가 OpenCV에서 정한대로 정의되어야 한다.
즉, event를 처리하는 내부 코드는 개발자가 본인이 원하는대로 구현할 수 있으나, 함수의 형식 은 꼭 지켜야 해당 함수가 이벤트 발생시 호출이 가능 하다
다음은 더블클릭 이벤트 발생시, 해당 위치에 원을 그리는 구현이 되어 있다.
#!/usr/bin/env python
import cv2
import time, os
import numpy as np

# mouse callback function
def create_dblclk_cb(dblclk_threshold=0.3):

    # mouse callback function
    def db_click(event, x, y, flags, param):
        if event == cv2.EVENT_LBUTTONDBLCLK: # double click event!
            cv2.circle(img,(x,y),100,(255,0,0),-1)


    last_click_time = 0

    def db_click_mac(event, x, y, flags, params):
        nonlocal last_click_time
        if event == cv2.EVENT_LBUTTONDOWN:
            current_time = time.time() # seconds
            if current_time - last_click_time < dblclk_threshold:
                cv2.circle(img,(x,y),100,(255,0,0),-1)
            last_click_time = current_time

    os_str = os.uname().sysname
    if os_str == "Darwin":
        return db_click_mac
    else:
        return db_click

    return db_click


if __name__ == "__main__":
    # Create a black image, a window and bind the function to window
    img = np.zeros((512,512,3), np.uint8)
    cv2.namedWindow('image')
    cv2.setMouseCallback('image',create_dblclk_cb())

    while True:
        cv2.imshow('image',img)
        if cv2.waitKey(20) & 0xFF == 27: # enter ESC
            break
        if cv2.getWindowProperty('image', cv2.WND_PROP_VISIBLE ) <1:
            break
    cv2.destroyAllWindows()
- macOS의 경우,
EVENT_LBUTTONDBLCLK가 잘 동작하지 않는 경우가 많음.- 때문에, single click에 up과 down 관련 event와 발생 time 차이를 이용하는 형태로 구현함.
- 전역변수를 피하기 위해 closure 패턴을 사용하여 구현.
- 위에서 구현한 callback 함수를 OpenCV의 window 와 binding시킴 :
cv2.setMouseCallback이용.
참고자료: Closure란
More Advanced Demo
다음은 좀 더 기능이 추가된 application을 구현한 코드임.
- 원과 네모를 선택하여 그릴 수 있고, 네모의 경우, 마우스를 드래그하여 크기를 결정할 수 있음.
- 이를 위해 mouse callback function 에서
mode에 따라 다른 도형을 그리도록 만들어짐.
여기서는 global variable을 사용하여 구현했으나,
가급적 closure로 변경해보길 권함.
import numpy as np
import cv2 as cv

drawing = False # true if mouse is pressed
mode = True # if True, draw rectangle. Press 'm' to toggle to curve
ix,iy = -1,-1
# mouse callback function
def draw_circle(event,x,y,flags,param):
    global ix,iy,drawing,mode
    if event == cv.EVENT_LBUTTONDOWN:
        drawing = True
        ix,iy = x,y
    elif event == cv.EVENT_MOUSEMOVE:
        if drawing == True:
            if mode == True:
                cv.rectangle(img,(ix,iy),(x,y),(0,255,0),-1)
            else:
                cv.circle(img,(x,y),5,(0,0,255),-1)
            cv.imshow('image',img)
    elif event == cv.EVENT_LBUTTONUP:
        drawing = False
        if mode == True:
            cv.rectangle(img,(ix,iy),(x,y),(0,255,0),-1)
        else:
            cv.circle(img,(x,y),5,(0,0,255),-1)
        cv.imshow('image',img)
- 위에서 구현한 callback 함수를 OpenCV의 window 와 binding시킴 :
cv2.setMouseCallback이용. mode를 변경하기 위해서 키보드의 키m을 toggle 키로 동작하도록 main loop에서 해당 구현을 추가함.
다음 조각코드가 실행코드임.
img = np.zeros((512,512,3), np.uint8)
cv.namedWindow('image')
cv.setMouseCallback('image',draw_circle)

cv.imshow('image',img)
while(1):
    k = cv.waitKey(1) & 0xFF
    if k == ord('m'):
        mode = not mode
    elif k == 27:
        break
    if cv.getWindowProperty('image', cv.WND_PROP_VISIBLE ) <1:
        break
cv.destroyAllWindows()
Note0 : 기능 개선
- 원을 그리는 부분을 내접타원을 그리는 것으로 변경해보라.
- 드래그 중에 그려지는 부분이 겹쳐지는 버그를 수정해보라.
import cv2
import numpy as np

drawing = False # true if mouse is pressed
mode    = True  # if True, draw rectangle. Press 'm' to toggle to curve
ix,iy = -1,-1

# mouse callback function
def draw(event,x,y,flags,param):
    global ix, iy, drawing, mode

    tmp = None

    if event == cv2.EVENT_LBUTTONDOWN: # left button down event
        drawing = True
        ix,iy = x,y

    elif event == cv2.EVENT_MOUSEMOVE: # mouse move event
        if drawing == True:
            tmp = img.copy()
            if mode == True:
                cv2.rectangle(tmp,(ix,iy),(x,y),(0,255,0),-1)

            else:
                w = x-ix
                h = y-iy
                cv2.ellipse(tmp, (ix+w//2,iy+h//2),
                            (np.abs(w)//2,np.abs(h)//2),0,0,360, (0,0,255),-1)
                cv2.rectangle(tmp,(ix,iy),(x,y),(0,255,0),1)

            cv2.imshow("image",tmp)
            cv2.waitKey(1)

    elif event == cv2.EVENT_LBUTTONUP: # left button up event
        drawing = False
        if mode == True:
            cv2.rectangle(img,(ix,iy),(x,y),(0,255,0),-1)
        else:
            # if not (tmp is None):
            #     img = tmp.copy()
            w = x-ix
            h = y-iy
            # cv2.ellipse(img, ( (ix+w//2,iy+h//2), (w,h),0), (0,0,255),-1)
            cv2.ellipse(img, (ix+w//2,iy+h//2), (np.abs(w)//2,np.abs(h)//2),0,0,360, (0,0,255),-1)
            # cv2.rectangle(img,(ix,iy),(x,y),(0,255,0),1)
            # cv2.circle(img,(x,y),5,(0,0,255),-1)
            cv2.imshow("image",img)
다음은 수행코드임.
img = np.zeros((512,512,3), np.uint8)
cv2.namedWindow('image')
cv2.setMouseCallback('image',draw)

cv2.imshow('image',img)
while(1):
    k = cv2.waitKey(10) & 0xFF
    if k == ord('m'):   # enter m
        mode = not mode
    elif k == 27:       # enter ESC
        break

    if cv2.getWindowProperty('image', cv2.WND_PROP_VISIBLE ) <1:
        break

cv2.destroyAllWindows()